recipes

Lobster Coconut Noodle Soup

Lobster Coconut Noodle Soup

Here is a recipe I adapted back in 2016. With Lobster season in full swing, here's a good way to use up your leftover lobsters (if there are any!).  It's a nice, quick and healthy option for those who always may have a little stomach irritation with the full cream in traditional soup. Give this recipe a try, it might just become your new go to for left over lobster!

Simplified Caesar Salad Dressing

Salad season is on the way!

Here are some reasons why you should ditch the bottled dressings and spend an extra 5 minutes making your own:

  • They are full of artificial flavours

  • They contain unnecessary sugars (like high-fructose corn syrup…who needs that on a salad… or ever?)

  • Bottled dressings are also made with tons of preservatives to prolong their shelf life … ever wonder why they don’t expire for 2 years?

  • These types of dressings are also loaded with trans-fat (the bad kind of fat!)

All that being said, there are some bottled dressings you can buy with some clean ingredients and lower on the preservative side (these can be pretty pricey for a bottle though). The bigger picture here is that if you are making a dressing from scratch it’s going to 1. Taste better not only because its super fresh but also because you made it yourself (isn’t that always the way!) 2.  You don’t have to have 10 bottles of half used dressing in your fridge for years and years and years…you get the point. If you make your own, you can make as much as you need and there is no waste! 3. You can control the ingredients you put in your dressing, if there are any dietary restrictions or allergies this is the perfect way to know exactly what you are getting!

 The recipe for this salad dressing is a Caesar style dressing, its light, healthy and full of flavour!

 Caesar Salad Dressing:

Ingredients:

1/3 cup plain Greek yogurt

1 clove of Garlic

2 tablespoons Apple Cider Vinegar

1 tablespoon Tamari (or coconut aminos)

1 tablespoon Extra Virgin Olive Oil

1 tsp Dijon Mustard (I like to use an organic brand and make sure it is free of canola oil)

Sea Salt & Pepper to taste!

Directions:

Put all ingredients in a food processor, blend until smooth. You can also use an immersion blender or even a regular blender! If you don’t have any of those, make sure the garlic is minced well and whisk all ingredients together and let stand for a few minutes before using to make sure all the flavours come together.

Enjoy & happy BBQ’ing!

Like this dressing? Check out our “Perfect summer dip” recipe by clicking HERE.

Chicken Wing Weekend!

What big game? We just like chicken wings…….

We love chicken wings, but often wings from a restaurant, or ready-bake wings are filled are deep fried and filled with ingredients that we try to stay away from. Here’s our go-to recipe for wings at our house. Keep in mind I’m not a huge “measurer” when I cook, I combine ingredients until I hear the spirits of my ancestors say “enough child”, so these are approximate, give or take…..

Do you do wings for Super Bowl?

Gluten-Free, Baked wings

Preheat oven to 350 F

Combine in a medium size bowl:

  • 4 ibs wings (both kinds)

  • 2 cups “Aurora” Gluten-free Bread Crumbs

  • 2 tsp Himalayan pink salt

  • 3 tbsp Onion powder

  • 3 tbsp Garlic powder

  • 2 tsp Smoked paprika

  • 1/2 tsp Cayenne (more if you like spice)

  • 1 tsp Sage

  • Dash of pepper, oregano, cumin seed, coriander, fennel, nutmeg, fenugreek, clove, cardamon, cinnamon, ginger

Line a baking sheet with parchment. Drop a couple wings into bowl at a time, and coat with your mixture, place on baking sheet. Bake wings at 350 for 20-25 minutes, remove from oven and flip wings over. Lower temp to 300 and place wings back in oven. Bake another 20-25 minutes, remove from oven, flip again and lower temp to 250. Bake another half hour. If you like them crispy, leave them in a little longer.

To make hot wings, we just use old fashioned Tabasco sauce to spice them up. Our kids like to dip them in full-fat plain yogurt. I made some yesterday and I’m making them again tomorrow!

Enjoy!

If you like this recipe, check out this dip that would pair well with it!

Is Gingerbread The New Peppermint?

It is obvious that the fall and pumpkin spice vibes have been forgotten about and everywhere you go now its full on holiday mode.

The past few years I noticed that the popular holiday food & drink items were always “peppermint mocha” or “peppermint chocolate” themed. This year, that trend seems to be dead (except for those loyal peppermint lovers) and everywhere I look its all about gingerbread!

I am not going to lie…this is kind of exciting to me, I love the combination of spices that make up the gingerbread flavour. What isn’t so great, is most (or all for that matter) of the ingredients used to make these treats that you can find in the stores.

So, I thought it would be good to share not one, but two gingerbread recipes that you can make at home and enjoy throughout this holiday season!

One thing I really want to highlight here is that in conventional gingerbread recipes the use of molasses is typically meant to be “fancy molasses”. The recipes I am sharing today both use blackstrap molasses. (You can click on that link to read more about the benefits of blackstrap molasses).

To summarize, using fancy molasses is only going to give you a subtle taste of molasses and lots of extra sugar and not much nutritional value (vitamins and minerals). Using blackstrap molasses, there are many more benefits than just adding flavour. It has less sugar, way more iron (a great source of iron actually if you suffer with low iron - reach out and I can give you some tips about how you can take it as a natural iron supplement), calcium, magnesium, B vitamins and many more essential nutrients.

Therefore, by making these recipes not only are you getting extra nutrients, you are getting a delicious holiday treat as well that the whole family can enjoy….or you can keep all to yourself, that is your cal!
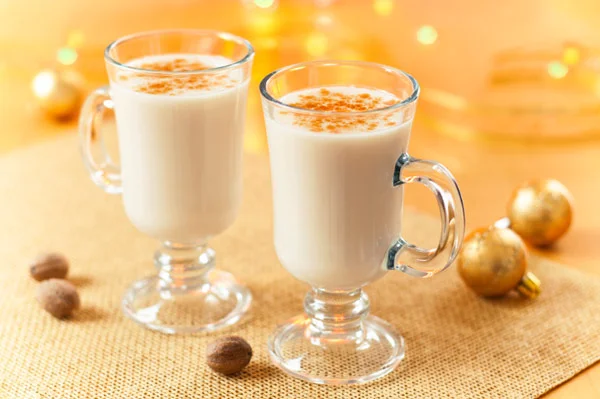
Gingerbread Latte

Ingredients:

  • 1/2 cup coffee (if you are not a coffee drinker you could use an herbal “coffee” blend. I like Dandy Blend. Or - you can also use Earl Grey tea!)

  • 1 tsp blackstrap molasses **

  • 1/2 cup organic coconut milk (full fat)

  • 1/8 tsp ground ginger

  • 1/4 tsp cinnamon

  • dash of cloves

Directions:

  • Add all ingredients to saucepan and heat thoroughly

  • Remove from heat and add to blender, blend until frothy. If you do not have a blender - whisk vigorously.

    Pour into your favourite mug and enjoy !

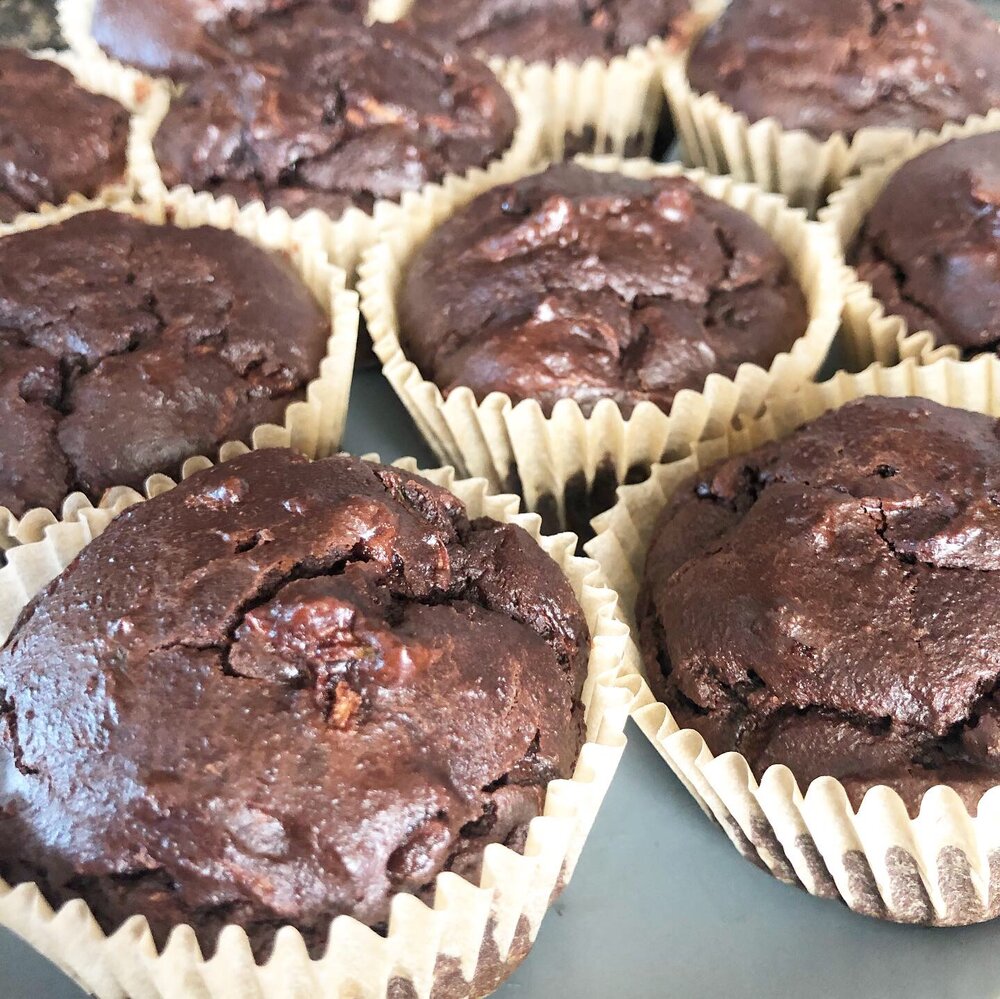
    Gingerbread Man Protein Cookies

    Ingredients

  • 1 1/4 cup almond flour

  • 1/2 cup vanilla protein powder

  • 3 tbsp coconut sugar

  • 1 tsp baking powder

  • 1 tsp cinnamon

  • 1/4 tsp nutmeg

  • 2 tbsp blackstrap molasses **

  • 1 egg

  • 1/4 cup tapioca flour (or any kind of flour, for dusting)

Directions:

  • Pre-heat oven to 375 and line baking sheet with parchment paper

  • Combine dry ingredients in large bowl, set aside

  • Combine wet ingredients in separate bowl. Add wet ingredients to dry, mixing until a dough consistency forms.

  • Dust flat surface with flour and roll out the dough with a rolling pin and cut out shapes!

  • Place on baking sheet, cook for 8-10 minutes.

  • Let cool & enjoy

**Notes:

One thing to be clear about when getting blackstrap molasses, please buy an organic - un-sulphured kind. I have had success with this at the Bulk Barn or Super Store in the natural food section.

Also, I realize there is no actual ginger in the recipe for gingerbread cookies and that may seem “odd”. However, it was just to simplify the recipe and not have too many ingredients. You will still get the same gingerbread taste from the spices used. If you want to add ginger, I would recommend using 1/4 tsp ground ginger - this will add more of that spicy taste to the cookie.

I hope you enjoyed this post, and if you tried out these recipes let me know how they went for you!

Allyson

Struggling with your health goals and your diet? Holistic Nutritionist Allyson Lewis offers complimentary discovery consultations to see if you are a good candidate for a holistic program. Call our office, 902-270-7022 to speak with Allyson, or start your conquest by booking with her by clicking HERE.

Cinnamon Maple Pumpkin Seeds - Recipe

In the next few days leading up to Halloween a lot of families will be carving pumpkins to put out on their step for the night of Halloween … Fun Fact: This is a Celtic tradition! The Celts used to carve faces in vegetables like squash and turnips and place a candle inside to light the face which they believed would scare away evil spirits that lurked in the darkness and light a path to their home for good spirits and visitors!

After cleaning out the pumpkins you are usually left with all the “guts” as my kids call it, which sometimes includes a lot of seeds. These typically will just get discarded into the green bin or compost, but one thing I enjoy doing with my seeds is roasting them to make a tasty little snack!

Pumpkin seeds that we see in stores in the raw form are usually green, this is because the shell has been removed (that is the white part of the ones we get directly from any type of squash). In the raw form from a sore or fresh from a squash, you will still get the same nutrient benefits! These little seeds are full of important nutrients the body needs like fibre, iron, and many vitamins and minerals. They are also high in antioxidants, and can help regulate blood sugar!

CINNAMON MAPLE ROASTED PUMPKIN SEEDS

  • 1 cup pumpkin seeds (washed and dried)

  • 1 tablespoon extra virgin olive oil

  • 2 tablespoons maple syrup

  • 1/2 teaspoon sea salt

  • 1/2 tablespoon cinnamon

Directions:

  1. Preheat oven to 300 degrees and line baking sheet with parchment paper.

  2. Prep seeds - make sure they are washed and dried thoroughly this will help with the crunch factor

  3. Mix everything together in a bowl

  4. Spread evenly onto baking sheet

  5. Bake for 40-50 minutes or until golden brown - stirring half way

  6. Remove from oven, let cool & Enjoy!

You can make any flavour you like using fresh herbs or spices to make them more savoury (smoked paprika would be a good one!) or even using raw cacao, shredded coconut and coconut oil to make a chocolate flavour. I am a sucker for anything maple cinnamon so this is what I focus on in this recipe but the options definitely do not end there!

These are great to have ready to go for halloween night to snack on and might help you avoid any temptation of wanting to eat the snacks you might have aside for your trick-or-treaters!

Store them in an airtight container at room temp (once completely cooled to avoid sticking together or getting soft!)

- Happy Halloween -

Who Doesn't Love A Good Apple Crisp? - Recipe

Happy Thanksgiving weekend everyone!

One thing I enjoy about family get togethers is making healthy versions of classic recipes and tricking my whole family into thinking its their traditional recipe (ha ha ha!)

i am sure every family in Cape Breton has a traditional recipe for Apple Crisp. While yes, they are delicious, I don’t see the need for crazy amounts of brown sugar, white sugar, white flour and up to 1/2 cup of butter which makes up the bulk of these recipes (and then top that off with vanilla ice cream! whoa!)

So if you are looking to bring healthier options to your thanksgiving dinner this weekend, give this apple crisp a try and let us know what you think! I am heading to get some local apples later today so i can prepare this desert for my dinner tomorrow and I will also be topping the warm crisp with organic coconut ice cream !

Not So Traditional Apple Crisp - Serves: 8 - Time: 1 hour

Ingredients:

2-4 large apples (cored and sliced)

1/3 cup maple Syrup (divided)

1 tbsp Coconut Flour

1/4 cup unsweetened applesauce (organic or homemade!)

1 cup oat Flour

3/4 cup oats

1 tsp baking Powder

1/2 tsp sea Salt

1/3 cup coconut Oil

1 cup Organic Coconut Ice Cream (optional)

Directions:

Preheat oven to 350ºF (177ºC). Place coconut oil in freezer to chill.

  1. Add apples, 1/3 of the maple syrup, coconut flour and applesauce to a medium bowl and toss until coated. Set aside while you make the crust.

  2. Add the oat flour, oats, the remaining 2/3 of the maple syrup, baking powder and sea salt to a different bowl and stir until combined.

  3. Remove coconut oil from the freezer and add to mixture. Use your fingers to work it in until coarse crumbs form and the mixture holds together when pressed.

  4. Remove a 1/3 of the crumbs for the topping and pour the remaining crumbs into the bottom of a tart pan or pie dish. Press the dough evenly into the pan.

  5. Pour the apples over the crust. Sprinkle the remaining crumble evenly over the apples.

  6. Bake for 40 to 45 min or until the crust is lightly brown. Check at 20 to 30 minutes if the tart is getting too brown. If so, tent with foil to prevent burning.

  7. Scoop into bowls and serve with organic coconut ice cream and Enjoy!

Looking for more fall inspired recipes? Click here and download our free Fall Recipe E-book!

Cleaned Up Pumpkin Spice Latte - Recipe

Untitled design (4).png

You know it is officially fall when everything is all about pumpkins, pumpkin pie and especially the PSL (pumpkin spice latte)

Personally, I don’t see this as a bad thing ! Pumpkins are delicious and what is referred to as pumpkin spice is made up of some of my favourite spices (cinnamon, ginger and nutmeg!)

Pumpkins are a really great source of nutrients, antioxidants, vitamin C and loads of gut friendly fibre. The spices are equally as good for you with cinnamon being helpful for regulating blood sugar and ginger has anti-inflammatory benefits.

However, most of the pumpkin spiced goodies we get this time of year contain way too much added sugar (as much as 50 grams of sugar in a 16oz pumpkin spice beverage - that is a lot!)

We figured we would help you out with your pumpkin spice addiction and give you a healthy, cleaned up version of the traditional pumpkin spice latte (trust me, you won’t want to go back!)

Check it out and let us know if you give it a try!

CLEANED UP PUMPKIN SPICE LATTE

Yields: 1 serving

Ingredients:

1/2 cup organic coffee

2tbsp pumpkin puree (organic if canned OR homemade - see instructions below) *

1.5 tbsp pure maple syrup

1/2 tsp pumpkin pie spice **

3/4 cup unsweetened almond milk ***

Directions:

  1. Brew coffee and set aside

  2. in a sauce pan over med. heat, combine pumpkin puree, spice, and maple syrup. Once combined, add in almond milk and simmer until heated.

  3. Transfer to a blender, pulse until frothy (you can use a hand held blender also)

  4. Add milk mixture to hot coffee. Use a spoon to hold back froth then top latte with froth.

  5. Optional - top with whipped cream or coconut whip, sprinkle with additional pumpkin spice

    Enjoy!

NOTES

* Homemade Pumpkin Puree - cut 1 small pumpkin into large chunks - bake in baking dish with lid on and 1/4” water in bottom of dish in oven at 375 degrees for 35-45 minutes or until tender. Blend/puree in food processor until smooth. Using fresh pumpkin will provide more nutrients and also taste better!

** DIY Pumpkin Pie Spice - 1/4 cup ground cinnamon, 4 tsp ground ginger, 1Tbsp allspice - when buying spices try to purchase organic, these have gone through less processing and are much more fresh than highly processed versions.

*** No almond milk ? use coconut milk (or any milk of your liking!)

-caffeine free? use extra milk!

-no blender? whisk everything together in sauce pan - this will not be as frothy but will still taste delicious!

Not into pumpkin? Check out these Gingerbread inspired recipes HERE

Happy (almost) Fall!

All summer long on Friday’s I have been posting some of my favourite recipes. So this week I thought I would do something a little bit different.

With a new season upon us and because it also happens to be one of my favourite times of year for cooking and using all the great local ingredients we have at our fingertips here on the east coast, I thought I would put together a free downloadable e-book with some fall inspired recipes!

The e-book also comes with some informational pages about immune boosting foods and also what it means to “eat in season”. The recipes have modifications in the notes if you are looking for Gluten free, vegetarian or vegan options as well.

I hope you get to try some of the recipes out and if you do, be sure to let me know! Download the book, print it off, share with your family and friends, and Enjoy!

~ Allyson

Chocolate Zucchini Blender Muffins

This muffin recipe was a pretty big hit at my house…no one even knew there was a vegetable mixed in!

If you do not have a blender…no worries it is not necessary. You can mix it the old fashion way (by hand!) or you can also use a hand mixer. If you are going to make them without the blender or mixer, make sure to whisk the eggs and wet ingredients before adding in the dry ingredients!

Give them a try and let us know what you think!

Chocolate Zucchini Blender Muffins - Recipe (Yields 12)

Ingredients:

  • 3 eggs

  • 2 cups almond flour

  • 1 cup zucchini (grated & strained - i like to use cheesecloth or a mesh bag to remove excess water from the zucchini)

  • 1/2 cup tapioca starch (brown rice flour works as well or an all purpose flour if you don’t want to be gluten free)

  • 1/2 cup raw cacao powder

  • 1/2 cup + 2 tbsp maple syrup

  • 1/2 cup dark chocolate chips (or dairy free chocolate chips - I like the “enjoy life” brand)

  • 2 tbsp avocado oil

  • 1/2 tsp sea salt

  • 1/2 tsp baking soda

Directions:

  1. Preheat oven to 350 F

  2. Put all ingredients (except zucchini and chocolate chips) in blender.

  3. Blend for 10-15 seconds on high, scrape down sides and do 1-2 more times until fully mixed.

  4. Put batter into a mixing bowl, stir in zucchini and chocolate chips

  5. Fill muffin cups 3/4 of the way with the batter

  6. Bake in the oven for 18-20 mins or until toothpick comes out clean

Slow Cooker Sausage and Kale Soup - Recipe

I always love a good bowl of soup, but it seems like during the fall and winter it is a “go-to” for those extra chilly days. Not that I am wishing away what we have left of summer…but I do enjoy cozying up with a nice homemade bowl of soup during fall!

The main reason I wanted to share this recipe is because I was at the Farmers Market last weekend and picked up some fresh sausages from Thyme For Ewe Farm and they were so delicious and I think they would be perfect for this recipe! There was also a lot of other farmers there as well with tons of fresh produce, you could pick up everything there to make this recipe which is a bonus because not only is everything extremely fresh but you are also supporting local as well.

Check out the recipe below and let us know what you think.

Ingredients:

  • 12 oz pork sausages, cut into chunks

  • 1 medium yellow onion, diced

  • 2 carrots, diced

  • 2 celery stalks, diced

  • 8 cups kale

  • 8 cups water or broth

  • 2 tsp sea salt

  • 3/4 cup long-grain brown rice or quinoa (optional)

Directions:

  1. Add all ingredients into slow cooker and cook on high for 4 at least 4 hours or 8-12 hours on low.

  2. Divide and Enjoy !

Notes:

  • Refrigerate for up to 3 days

  • Can be kept in the freezer as well, the grains will thicken so if you plan on freezing you may want to omit the grains and cook in when you plan on having it

  • Use a homemade bone broth for liquid (you can do half broth half water as well…play around with it!)

  • No slow cooker ? No problem! If cooking on a stove top, brown sausage and onions first then, add in carrots, celery, water/broth and salt. Bring to a boil, add in grains if using them. Simmer until grain is cooked and veggies are tender. Stir in kale until it wilts just before serving

DO you love soup? Check out the “Lobster Coconut Noodle Soup” recipe by clicking HERE.